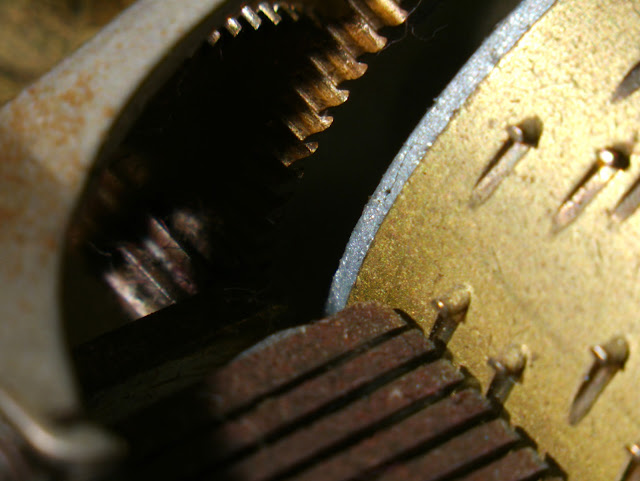
In this series I will show how you can use a cheap close-up filter to take macro pictures. This post is a general introduction, and the next post will show you how to fix chromatic aberration introduced by the filter.
There are many ways of obtaining relatively large magnification with a camera. You can find out about many of these methods on the excellent Micro 4/3rds Photography blog: using a dedicated macro lens, extension rings, a reverser ring, or a close-up filter...
I'm not willing to spend more than 500$ for a dedicated macro lens, so I went the cheapest possible way: using a 8x close-up filter, that you can find for 8$ on dealextreme, and maybe cheaper on eBay. I went for the 8x filter instead of the 10x, because the latter has bad reviews: the lens element protrudes at the back of the filter, and you risk scratching your lens when mounting the filter (Fredrik Gløckner talks about it in this post); it also seems to be optically inferior.
I tried the filter with 2 lenses: Panasonic 14-42mm, and 45-150mm. Both use a 52mm thread, so I could reuse the same filter. In each case, I use the camera in manual focus, set the focus to minimum distance, to obtain as much magnification as possible, and take a picture of a ruler.
The magnification you obtain with these combinations is listed in the table:
Clearly, only the 45-150mm lens at the maximum focal length, with the 8x filter, can be considered a true "macro" configuration. The rest does not provide enough magnification:
Interestingly, the 45-150mm, without filter, is a very bad lens for close-up works: the minimum focus distance is 0.9m, and leading to worse magnification than the 14-42mm. On the other hand, the 8x close-up filter has a huge effect on this lens. Why? No precise idea, but it has something to do with the lens design.
There is some obvious chromatic aberration (red and blue fringes) on the sides of the image. I will explain the method to correct chromatic aberration in the next post.
The effect of the correction is quite striking on a 100% crop:
Even after correction, the image still looks fairly blurry, possibly due to diffraction.
Finally, the corrected image looks very decent, especially considering the cost of the close-up filter.
You can find a set a sample pictures here, or see the slideshow below. The pictures are taken at f/22, 150mm, ISO 160, and chromatic aberration corrected, unless otherwise noted.
There are many ways of obtaining relatively large magnification with a camera. You can find out about many of these methods on the excellent Micro 4/3rds Photography blog: using a dedicated macro lens, extension rings, a reverser ring, or a close-up filter...
 |
| 8$ close-up filter. |
Magnification
The magnification is defined as the ratio between the sensor size and the object size. On a Micro 4/3, the sensor size is 17.3mm, so if you can image 17.3mm of a ruler, you have a 1:1 magnification. If you get 8.15mm, you have a 2:1 magnification, etc. |
| Picture of a ruler. Here, you see about 15mm of the ruler, so the magnification is 17.3:15 = 1:0.87 or 1.15x. Note the chromatic aberrations on the side of the image, but more on that later... |
| Lens | Magnification with 8x filter |
Magnification without 8x filter |
| 14-42mm@14mm | 1:5 | 1:10.5 |
| 14-42mm@42mm | 1:2.5 | 1:5.3 |
| 45-150mm@45mm | 1:2.7 | 1:13.6 |
| 45-150mm@150mm | 1:0.87 (1.15x) | 1:5.7 |
Clearly, only the 45-150mm lens at the maximum focal length, with the 8x filter, can be considered a true "macro" configuration. The rest does not provide enough magnification:
 |
| Left to right: 45-150mm@150mm, 14-42mm@42mm, 14-42mm@14mm (always using the 8x filter) My Reuge/Romance Swiss-made music box does not seem to enjoy a lot the hot and humid weather or Singapore, leading to quite a thick layer of oxide on the metal... |
Interestingly, the 45-150mm, without filter, is a very bad lens for close-up works: the minimum focus distance is 0.9m, and leading to worse magnification than the 14-42mm. On the other hand, the 8x close-up filter has a huge effect on this lens. Why? No precise idea, but it has something to do with the lens design.
Sample pictures
These sample pictures are taken with the 45-150mm lens, at 150mm, using a very small aperture (f/22), to get as much depth of field as possible. Sure, you will lose quite a bit a resolution due to diffraction, but I think this still gives best results, and makes focusing a little easier.
Macro photography needs external lighting, even on a sunny day you will not get enough light on the sensor. For this purpose, I use an external flash (an old Nikon SB-22), which I hold at a certain distance using a TTL flash extension cord. The flash is unfortunately not fully compatible with Panasonic cameras (no TTL mode), so it sometimes takes a few tries to get the correct amount of light on the scene.
Here is one sample picture:
Here is one sample picture:
 |
| Original image. |
The effect of the correction is quite striking on a 100% crop:
 |
| Left: Original image. Right: Chromatic aberration corrected image. |
Finally, the corrected image looks very decent, especially considering the cost of the close-up filter.
 |
| Corrected image. |
You can find a set a sample pictures here, or see the slideshow below. The pictures are taken at f/22, 150mm, ISO 160, and chromatic aberration corrected, unless otherwise noted.
No comments:
Post a Comment